I love nuts and its but natural to have them as often as I can even among savoury food. One staple Chinese take away dish that I really enjoy is the stir-fried chicken with cashews. I found this recipe in my trusted Chinese Cuisine by Huang Su-Huei and decided to give it a go. It is quite good if I may say so myself although I think I would increase the sauce to double it the next time.
Chicken with Cashews
500 g boneless chicken meat - cut into bite-sized pieces
2 green onions - cut into 1-inch pieces
1 cup diced cucumbers
1/2 cup cooking oil
1 cup fried cashews
*Marinade:
1/4 tsp fine sea salt
1 Tbsp cooking wine
1 1/2 Tbsp cornflour (cornstarch)
1 1/2 Tbsp water
1 Tbsp cooking oil
*Sauce:
1/2 tsp fine sea salt
1 tsp sugar
dash of black pepper
dash of sesame oil
6 Tbsp water
2 tsp cornflour (cornstarch)
- Combine the sauce mixture and stir to dissolve the salt and water. Set aside.
- Combine marinade and stir to dissolve the salt. Add chicken and marinate for about 15-20 minutes.
- Add in the cornflour, water, and 1 Tbsp cooking oil to separate the meat.
- Heat the 1/2 cup cooking oil in a wok and fry the chicken in medium heat for about 3-4 minutes or until cooked and golden brown. Set aside.
- Remove the oil from the wok but retain about 1 Tbsp in it. Reheat and stir fry the green onions until aromatic.
- Add in the cucumbers and stir fry for about 1 minute.
- Stir in the chicken and cashews and stir for a few seconds.
- Add the sauce and stir until thick and covers all the ingredients. Dish up and serve.
I saw this in the latest edition of the Good Housekeeping magazine and thought how seasonally appropriate it is. The cake came out quite nice especially if served with some custard. Although I thought the cake itself is quite crumbly so I adjusted the milk in the recipe to 1/4 cup. This is highly recommended for your afternoon tea and to use up your strawberries.
The picture is not particularly stellar because I honestly thought it would not taste good so I didn't expend much effort in getting a better image. How wrong I was!
Strawberry Streusel Loaf
175 g [scant 3/4 cup] unsalted butter - softened
175 g [scant 1/2 + 1/3 cup] caster sugar
2 large eggs
250 g [scant 2 cups] self-raising flour
1/4 cup milk
grated zest of 1 lemon (optional)
200 g strawberries - hulled and quartered
*Streusel Topping
20 g [4 tsp] unsalted butter - chilled
20 g [scant 3 Tbsp]
1 Tbsp demerara sugar
1 Tbsp chopped roasted hazelnuts
- Preheat the oven to 180°C/fan 160°C/350°F. Grease a 9x5-inch loaf pan.
- Beat the butter and caster sugar until light and fluffy.
- Add the eggs one at a time until well combined.
- Using a spatula or wooden spoon, fold in the flour and lemon zest (if using), then milk until well combined.
- Spread 1/3 of the batter in the prepared pan. Scatter half of the strawberry on top of it.
- Repeat once more ending with the streusel topping.
- Bake for 1 hour or until a skewer poked in the middle comes out clean.
- Cool in the pan for about 10 minutes. Remove from pan and cool completely on a rack.
It's blueberry time again. Every year this time of summer there is a glut of blueberries in the grocery aisle. I thought of baking this with a new recipe from my reliable The New Best Recipe cookbook. I readily found out after taking the muffins out of the pan that I needed paper cases for these. They soon began listing on one side due to collapsing blueberries as they cooked and the cake itself was quite soft which really was not a problem. It was just some aesthetic thing. The topping, by the way, is optional. You can eat straight from the oven as is or put on some topping of your choice.
Blueberry Muffins
260 g [2 cups] plain flour
1 Tbsp baking powder
1/2 tsp fine salt
1 large egg
200 g [1 cup] granulated sugar
60 g [1/4 cup] unsalted butter - melted
300 g [1 1/4 cups] sour cream
200 g [heaping 1 cup] fresh blueberries
*Topping 1:
50 g [1/4 cup] granulated sugar
1/4 tsp ground cinnamon
melted butter
*Topping 2:
50 g [1/4 cup] granulated sugar
1/4 cup lemon juice
lemon zest
100 g [1/2 cup] sugar
- Preheat oven to 180°C/fan 160°C/350°F. Grease a 12-cup muffin pan or line with paper muffin cases.
- Mix the flour, baking powder, and salt in a bowl.
- In another bowl, whisk the egg then add the sugar. Mix well.
- Add the butter and then the sour cream. Mixing well after each addition.
- Stir in the blueberries into the flour mixture and stir to combine.
- Using a spatula, add the flour mixture into the egg mixture. Mix just enough to combine.
- Divide the batter in the prepared muffin tin.
- Bake for 25-30 minutes.
- Cool in pan for about 5 minutes. Remove from pan and cool on a wire rack.
- *For topping 1: While still warm, brush melted butter on top and dip in the combined sugar and cinnamon.
- *For topping 2: Combine the lemon zest and 1/2 cup sugar, set aside. Cook the lemon juice and 1/4 cup sugar in a saucepan over medium heat until the sugar is dissolved. While the muffins are still warm, brush top with the lemon syrup and then dip the top into the lemon sugar.

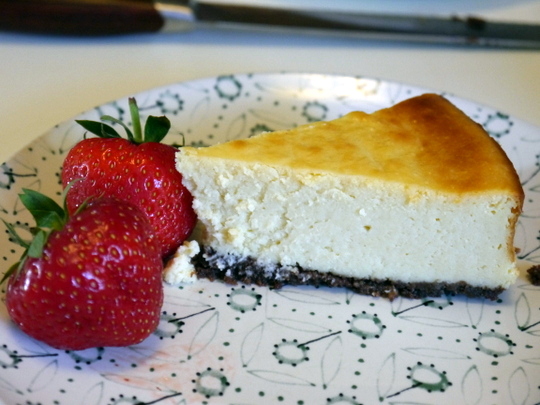
I got this from bonus recipe card from the BBC FoodFood magazine years ago. We paired it with sweet English strawberries which are very much in season today. I only ever buy English strawberries and only when it is in season which is around late May to August.
This is a baked cheesecake compared to some of my other cheesecake here in this blog which required no baking. Maybe later I would try baking this in a waterbath.
White Chocolate Cheesecake
*Base:
12 chocolate digestives (or graham crackers)
85 g [1/3 cup] butter - melted
2 tsp cocoa powder
1 Tbsp caster sugar (superfine)
*Filling:
900 g cream cheese (room temperature)
4 eggs
3 Tbsp plain flour
200 g [scant 1 cup] caster sugar
1/2 tsp vanilla extract
100 g white chocolate - finely grated
*Topping:
2-3 chocolate flakes (optional)
icing sugar (optional)
- Preheat oven to 180°C/fan 160°C/350°F. Grease and line the bottom of a 23 cm/9-inch springform pan.
- Crush the digestives by putting it in a plastic bag and then bashing it with a mallet or rolling pin.
- Mix the crushed biscuits with the rest of the base ingredients. Pour this in the prepared pan. Press the mixture with the back of a spoon to cover the bottom of the pan.
- Bake in the oven for 5 minutes. Remove from oven and cool.
- In a big bowl, combine all the filling ingredients with an electric mixer until well combined.
Pour mixture on top of the biscuit base in the pan.
- Bake for 50 minutes until almost firm but with a slight wobble in the middle.
- Remove from oven and cool completely in the pan.
- To serve, remove the cheesecake from the cake pan.
- [Optional] Dust the cheesecake with icing sugar. Break a few pieces of the chocolate flakes on top.

This is this year's birthday cake for myself. Very nice, moist and chocolatey. I especially like the cream cheese icing. I think I prefer it chilled straight from the fridge since the icing is on the soft side when at room temperature which caused a bit of problem when I brought it to work for my colleagues. The cling film covering it stuck on it so much that it didn't look too appetising.
This recipe is from my favourite epicurious.com food website
Sour Cream Chocolate Cake
195 g [1-1/2 cups] plain flour
3/4 cup cocoa powder
3/4 tsp bicarbonate of soda
1-1/2 tsp baking powder
1/2 tsp fine salt
1 cup sour cream
1/3 cup water
2 tsp vanilla extract
250 g [1 cup] unsalted butter - softened
270 g [1-1/3 cups] light brown sugar - firmly packed
3 large eggs
*For icing:
185 g [3/4 cup] unsalted butter - softened
250 g [1 cup] cream cheese - room temperature
115 g dark chocolate (70% cocoa) - melted and cooled
1 tsp vanilla
2 cups icing sugar - sifted
- Preheat oven to 180°C/fan 160°C/350°F.
- Grease and flour two 9-inch pans or 13 x 9-inch baking pan.
- Sift all the dry ingredients into a bowl. Set aside.
- Combine the sour cream, water, and vanilla in another bowl. Set aside.
- In a large bowl, using an electric mixer, beat butter and brown sugar until fluffy.
- Add eggs one at a time making sure to beat well after adding.
- Add flour mixture in batches alternating with the sour cream mixture beating well until well blended.
- Pour and spread the batter equally between the pans and smooth the top.
- Bake for 25 - 30 minutes for the 9-inch pans (40 minutes for 13x9-inch) pan or until a skewer poked in the middle comes out clean.
- Cool in pans for about 10 minutes. Turn out in rack and cool completely.
- Cake layers can be made 1 week ahead and frozen, wrapped well in plastic wrap. Thaw layers before putting on the icing.
*For the icing:
- Cream butter and cream cheese until light and fluffy.
- Add remaining ingredients and beat until well combined.
*To assemble:
- Lay first layer on the cake plate and spread some icing on it.
- Top with the second layer and spread the rest of the icing on top and around the cake.
I never knew that making pilau rice is so easy. Probably the only thing hard about it is assembling the myriad spices you need. Pilau rice, if you must know, is the spiced fragrant rice accompanying Indian dishes. There so many variations of it much depending on how colourful or how much spices you want in it.
I love how easy it is to cook this resulting in fluffy and soft fragrant rice. Highly recommended!
Pilau Rice
250 g [1-1/3 cups] basmati rice
2 2/3 cups water
1 Tbsp ghee or cooking oil
1 small onion - finely chopped
1/2 tsp fennel seeds
1 cinnamon stick - halved lengthwise
2 cardamon seeds - squashed open
3 cloves
2 tsp ground turmeric
2 bay leaves
- Wash and drain the rice several times with cold water then soak for 30 minutes.
- In a saucepan with a tight fitting lid, heat the oil and saute the onion in medium heat until soft (about 5 minutes).
- Add the rest of the spices until fragrant.
- Drain the water from the soaked rice and add the rice to the saucepan and stir to coat with the sauteed spices and oil.
- Add the water, stir, cover saucepan and bring to boil. Lower heat to simmer for 10 minutes.
- Turn off heat and keep covered and leave to steam for 15 minutes.
- Fluff up the rice with fork and serve while hot.
*Note: You can use rice cooker cup to measure the rice and water (1 rice cooker cup = 2/3 cup). The ratio is 1 cup rice to 2 cups water.
Okay I'm not too familiar with this Parmesan Chicken over on this side of the pond. I would assume this is name is popular over in the US. Over here it is called other things like chicken schnitzel or escalope. They may or may not have parmesan cheese but sure does make it very tasty. Some other variations of these involves brining the meat and also putting some tomato sauce and mozarella on top before grilling it for a few minutes. So those would be my next experiments in the mean time I leave you this recipe which I got from the lovely Ina Garten over at the Food Network.
Parmesan Chicken
(Chicken Escalope / Schnitzel)
2 chicken breasts
65 g [1/2 cup] plain flour
1/2 tsp fine sea salt
1/4 tsp ground black pepper
1 large egg
1 1/4 cups breadcrumbs
1/4 cup grated parmesan cheese
olive oil
unsalted butter
- Butterfly each of the chicken breast into two thin pieces. Pound each piece so that it will be about 1/4-inch thick.
- Combine the flour, sea salt, and black pepper. Set aside.
- Beat the egg with a teaspoon of water.
- Combine the breadcrumbs and parmesan cheese. Set aside.
- Dredge the pieces in flour then dip in the egg and then finally coat it with the breadcrumb mixture.
- Heat 1 Tbsp of the butter and 1 Tbsp of the olive oil in a pan. Fry the battered chicken pieces in the pan on medium-low heat of about 2 minutes each side.
- Serve with green leafy salad with vinaigrette.